by Dan Shaw, Business Development Agent
While we are all experts in our own way, this short, easy-to- read article may act as a refresher for those of us who have a tendency to forget what we had for breakfast today. I just want to quickly and succinctly go through the installation process of a typical IPI by Bison job. While in many if not most cases, the installation of our products is done by a third party (that means neither IPI nor the Dealer but a contracted individual/company), it is always the responsibility of the Dealer to insure that the installation is done correctly. This article will walk you through the minimum of what must be done to insure that the Installation is one that makes us (the Dealer and IPI) proud and the customer happy. Now to discuss quickly the steps involved.
The first step that should be done by the installer (not the Dealer) is the Field Check and then we move on from there.
1. Accurate field checks are critical to a successful project. Please do not decide what info we need in place of what we ask for. Remember, a bad or poorly done field check will always result in problems and additional costs and delays.
Note on the field checks any unusual situations such as conduit on beams, sprinkler lines, hidden beams, etc. While in many cases these potential problems are not obvious, the installer must be able to spot these potential problems.
2. When the time comes for the actual installation, a new set of requirements come into play. The installer has to understand that unloading and counting the equip- ment is the first thing to be done when they arrive at site. The time to report missing or damaged product is now, not on the last day of the project when it is often too late for IPI to react without extreme cost. It is important also to note that if a piece is missing or damaged, it must be noted on the Bill of Lading.
3. Before any installation begins, the area must be clean and the facility protected. This is especially important if working over a finished floor. This may consist of plastic, OSB and/or masonite or other material to protect the floor. The installer must be aware of this when providing an installation cost to the Dealer as IPI will not be responsible for this type of additional cost.
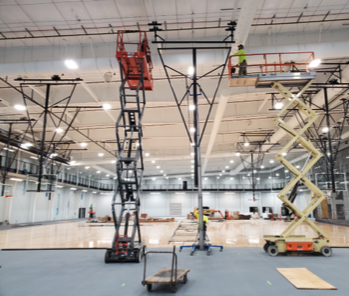
4. The most crucial step in any installation is the initial layout. This must be accurate. It is critical that the entire gym be laid out to find any possible discrepancies. This layout also includes a trip to the job trailer and the Superintendent to make sure that all the latest changes have been incorporated in the installation drawings supplied by IPI.
5. Safety is important at every step, but especially before any work is done above floor level. Make sure you have hard hats with you. Safety lines must be used. Scaffolding, if used, must be safety pinned at all times. Never move scaffolding with someone on it. Remember, in the long run, it is always faster to do the job safely. At most job sites, the General Contractor will have very specific safety requirements that all onsite subs must follow.
6. Always attach any ceiling mounted unit where and how the drawings show. Do not try to “redesign” a unit without first consulting IPI. You and your installer do not want to ‘buy’ the responsibility for design, that’s what we are here for. The one exception to this is wall mounted units. You must make the final decision on attachment of the unit to the wall as far as type of attachment and number of attachment points. Our guideline is never use less than a 1⁄2” bolt in any case and if you have questions on placement, call us.
7. The final actions to be taken by the installer before cleaning up and going home is a good visual inspection of the units for plumb, level, finish quality, etc. as well as a final operation and setting of limit switches. We also highly recommend a final contact with the GC and owner’s representative to get a sign off on the job.


